
Secure Boot Option Missing? Here’s How to Fix It

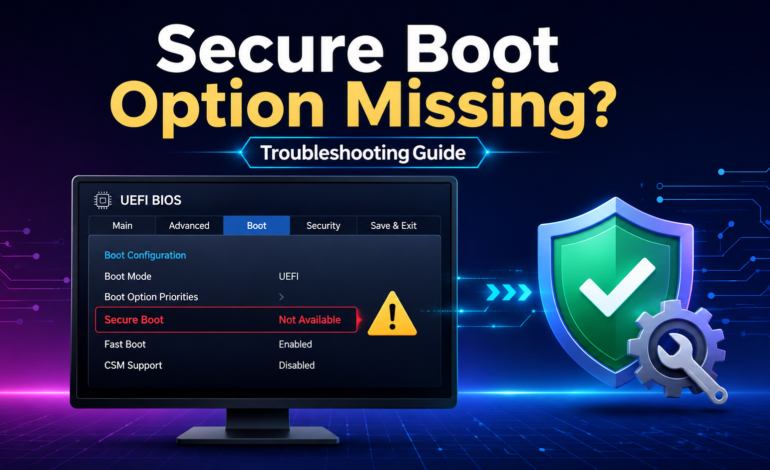
Quick Answer
If the Secure Boot option is missing, the most common causes include Legacy BIOS mode, Compatibility Support Module (CSM) being enabled, an MBR partition, outdated UEFI firmware, or missing Platform Keys (PK). Switching to UEFI mode, disabling CSM, converting your system disk from MBR to GPT, restoring Secure Boot factory keys, or updating your BIOS usually resolves the problem.
Key Takeaways
- Secure Boot may disappear if your PC is running in Legacy BIOS mode.
- CSM (Compatibility Support Module) often hides Secure Boot settings.
- Windows 11 requires UEFI Secure Boot for optimal security.
- Converting an MBR partition to GPT may be necessary before enabling Secure Boot.
- Restoring Platform Keys (PK) can make Secure Boot available again.
- A BIOS update or firmware update may fix compatibility issues.
- Most modern motherboards support Secure Boot when configured correctly.
Table of Contents
- Why Is the Secure Boot Option Missing?
- Common Causes of a Missing Secure Boot Option
- How to Fix Secure Boot Option Missing
- Troubleshooting Different Motherboard Brands
- Frequently Asked Questions
Introduction
Finding that the Secure Boot option is missing can be confusing, especially when you’re preparing your PC for Windows 11, improving system security, or trying to meet Microsoft’s hardware requirements. Many users expect to locate the setting in their BIOS or UEFI firmware, only to discover that it has disappeared, is greyed out, or isn’t available at all. Although this may seem like a hardware limitation, the problem is usually caused by firmware configuration rather than a defective motherboard.
Several factors can prevent the Secure Boot option from appearing. Your system may be running in Legacy BIOS instead of UEFI mode, the Compatibility Support Module (CSM) may still be enabled, or Windows might be installed on an MBR partition instead of GPT. In some cases, missing Platform Keys (PK), outdated UEFI firmware, or incorrect BIOS settings can also hide Secure Boot from the firmware interface. The good news is that most of these issues can be resolved without reinstalling Windows.
Before applying any fixes, it’s helpful to understand how Secure Boot functions during the startup process and why it plays a critical role in protecting your device. If you’re new to this technology, read our guide on How Secure Boot Works to learn how the boot verification process works.
You can also explore Secure Boot vs TPM 2.0 to understand how these security technologies work together.
In this guide, you’ll discover the most common causes of a missing Secure Boot option and learn proven solutions for restoring it across popular motherboard brands, including ASUS, MSI, Gigabyte, Dell, HP, Lenovo, and Acer.
Why Is the Secure Boot Option Missing?
At first glance, a missing Secure Boot setting might appear to indicate that your motherboard doesn’t support the feature. However, that assumption is rarely correct.
Most computers manufactured in the last decade include Microsoft Secure Boot support within their system firmware. The option often disappears because another firmware setting conflicts with it. Modern motherboards are designed to display Secure Boot only when specific requirements are met, ensuring the system follows a secure boot configuration.
Think of Secure Boot as the final step in a security checklist. If one prerequisite is incomplete, the firmware hides or disables the option until the configuration becomes compatible. This behavior helps prevent boot failures and reduces the risk of an incorrect boot configuration.
Several conditions
- The computer is running in Legacy BIOS instead of UEFI mode.
- Compatibility Support Module (CSM) is enabled.
- The Windows installation uses an MBR partition instead of GPT.
- Secure Boot factory keys or the Platform Key (PK) are missing.
- The motherboard requires a firmware update.
- Incorrect BIOS configuration prevents Secure Boot from activating.
Understanding these prerequisites makes troubleshooting much easier because the missing option is often a symptom rather than the actual problem.
Common Causes of a Missing Secure Boot Option
Every motherboard manufacturer implements firmware slightly differently, yet the underlying causes remain remarkably consistent. Identifying the correct cause before changing BIOS settings saves time and reduces the risk of unnecessary configuration changes.
1. Legacy BIOS Mode Is Enabled
One of the most common reasons for Secure Boot unavailable errors is that the system is using Legacy BIOS instead of UEFI mode.
Secure Boot was developed as part of the UEFI firmware specification and does not function with traditional BIOS boot methods. When the motherboard detects Legacy Boot Mode, it automatically hides Secure Boot because the feature cannot operate correctly.
This issue commonly affects older Windows installations that were originally configured before UEFI became the standard.
2. Compatibility Support Module (CSM) Is Enabled
Another frequent cause is the Compatibility Support Module (CSM).
CSM allows modern UEFI firmware to emulate legacy BIOS behavior so that older operating systems and hardware remain compatible. While useful in certain scenarios, this compatibility layer prevents Secure Boot from functioning as intended.
As a result, many motherboards automatically disable or hide Secure Boot whenever CSM is active.
3. Your Disk Uses an MBR Partition
The partition style of your storage drive also plays a significant role.
If Windows is installed using an MBR partition, the firmware typically boots in Legacy mode. Since Secure Boot requires UEFI mode, the option may remain unavailable until the disk is converted to a GPT partition.
Fortunately, modern versions of Windows include tools that can convert MBR to GPT without reinstalling the operating system in many cases.
4. Platform Keys (PK) Are Missing
Secure Boot depends on a collection of digital security certificates known as factory keys, including the Platform Key (PK).
These keys establish the chain of trust that allows the firmware to verify trusted boot components. If the keys have been deleted, corrupted, or reset during previous firmware modifications, Secure Boot may disappear from the BIOS or appear as unavailable
Fortunately, most motherboard manufacturers provide an option to restore the default Secure Boot keys directly from the firmware interface.
How to Fix Secure Boot Option Missing
After identifying the cause, the next step is applying the correct solution. In most cases, the Secure Boot option missing issue is resolved by adjusting your UEFI firmware settings rather than replacing hardware. Follow the solutions below in order, as each addresses one of the most common configuration problems.
Fix 1: Switch from Legacy BIOS to UEFI Mode
One of the most common reasons why Secure Boot is unavailable is that your computer is running in Legacy BIOS mode. Secure Boot is a feature of the UEFI firmware specification and cannot function while Legacy Boot is enabled.
Before making any changes, verify your current BIOS mode in Windows.
How to Check BIOS Mode
- Press Windows + R.
- Type msinfo32 and press Enter.
- Locate BIOS Mode in the System Information window.
- If it displays Legacy, Secure Boot cannot be enabled.
- If it displays UEFI, continue to the next troubleshooting step.
If your computer is still using Legacy BIOS, you’ll need to switch to UEFI mode before Secure Boot becomes available.
Related Guide: How to Check If Secure Boot Is Enabled in Windows 11 before modifying your firmware settings.
Fix 2: Disable Compatibility Support Module (CSM)
The Compatibility Support Module (CSM) allows modern motherboards to support older operating systems designed for Legacy BIOS. While useful for legacy hardware, it prevents UEFI Secure Boot from functioning correctly.
Many motherboard manufacturers automatically hide the Secure Boot menu whenever CSM is enabled.
Steps to Disable CSM
- Restart your computer.
- Enter the BIOS/UEFI firmware (commonly by pressing Delete, F2, or F10 during startup).
- Navigate to the Boot or Boot Configuration menu.
- Locate Compatibility Support Module (CSM).
- Set CSM to Disabled.
- Save your changes and restart the system.
After restarting, return to the firmware interface. In many cases, the Secure Boot settings will now appear.
Note: Menu names vary slightly depending on the motherboard manufacturer.
Fix 3: Convert Your Disk from MBR to GPT
Another frequent cause of the Secure Boot option missing in BIOS is an MBR partition.
Since Secure Boot requires UEFI mode, Windows should be installed on a GPT partition. If your system drive still uses MBR, the firmware may prevent Secure Boot from becoming available.
Check Your Partition Style
- Press Windows + X.
- Open Disk Management.
- Right-click your system disk.
- Select Properties.
- Open the Volumes tab.
- Check Partition Style.
If it says Master Boot Record (MBR), consider converting it to GUID Partition Table (GPT).
Modern Windows versions provide the MBR2GPT utility, allowing many systems to convert without reinstalling Windows. However, creating a complete backup before modifying disk partitions is strongly recommended.
Fix 4: Restore Secure Boot Factory Keys
Secure Boot relies on digital certificates called factory keys, including the Platform Key (PK). These keys allow the firmware to verify trusted bootloaders and operating systems.
If the keys have been deleted, reset, or corrupted, Secure Boot may disappear or remain disabled.
Restore Platform Keys
- Open the BIOS or UEFI firmware.
- Navigate to the Secure Boot menu.
- Locate an option similar to:
- Restore Factory Keys
- Install Default Keys
- Reset Secure Boot Keys
- Confirm the action.
- Save the configuration and restart your computer.
Restoring the default Platform Key (PK) often resolves situations where Secure Boot is greyed out or unavailable.
Fix 5: Update Your BIOS or UEFI Firmware
Older firmware versions may not fully support newer Windows security features or may contain bugs affecting Secure Boot functionality.
A BIOS update or firmware update can improve compatibility, fix known issues, and restore missing Secure Boot options.
Before Updating
- Confirm your motherboard model.
- Download firmware only from the manufacturer’s official website.
- Follow the vendor’s update instructions carefully.
- Ensure the computer has a stable power source throughout the update process.
Updating firmware should be performed cautiously because interrupting the process may prevent the motherboard from booting correctly.
Brand-Specific Tips
Although the underlying technology is the same, firmware menus differ between manufacturers.
ASUS BIOS
- Disable CSM first.
- Switch Boot Mode to UEFI.
- Restore default Secure Boot keys if necessary.
MSI Click BIOS
- Navigate to Settings > Advanced > Windows OS Configuration.
- Disable CSM.
- Enable Windows 11 WHQL Support if available.
- Check whether Secure Boot becomes visible.
Gigabyte UEFI
- Set Windows 10/11 Features to Windows UEFI Mode.
- Disable CSM Support.
- Install factory Secure Boot keys if prompted.
Dell BIOS
- Open Boot Configuration.
- Enable UEFI Boot Mode.
- Verify that Secure Boot is enabled after restarting.
HP BIOS
- Access Boot Options.
- Disable Legacy Support.
- Enable Secure Boot.
- Save changes before exiting.
Lenovo BIOS
- Change Boot Mode to UEFI Only.
- Disable Legacy Boot.
- Restore Secure Boot keys if required.
Acer BIOS
- Set an administrator password if Secure Boot settings are locked.
- Disable Legacy Boot.
- Enable Secure Boot after switching to UEFI mode.
Troubleshooting Checklist
Before moving to advanced troubleshooting, confirm the following:
| Check | Status |
|---|---|
| BIOS Mode is UEFI | ✅ |
| Legacy BIOS disabled | ✅ |
| CSM disabled | ✅ |
| System disk uses GPT | ✅ |
| Platform Keys installed | ✅ |
| BIOS updated | ✅ |
| TPM 2.0 enabled (recommended) | ✅ |
If every item above is complete and the Secure Boot option is still missing, the issue may be related to a firmware limitation, manufacturer-specific configuration, or a hardware compatibility restriction.
Troubleshooting, FAQs, and Conclusion
Even after following the recommended solutions, some users may still find that Secure Boot is unavailable or cannot be enabled. Fortunately, most remaining issues are caused by overlooked firmware settings or hardware compatibility rather than permanent system limitations. The troubleshooting tips below will help you identify the problem and restore Secure Boot successfully.
Common Mistakes That Prevent Secure Boot from Appearing
Many users unintentionally make configuration changes that prevent UEFI Secure Boot from becoming available. Avoiding these common mistakes can save hours of unnecessary troubleshooting.
1. Leaving Legacy BIOS Enabled
Switching only one firmware setting is often not enough. If Legacy BIOS remains active, Secure Boot will stay hidden because it requires UEFI mode to function.
Always verify that the system is configured to boot exclusively in UEFI mode.
2. Forgetting to Disable CSM
Many users convert their system to UEFI but overlook the Compatibility Support Module (CSM).
Since CSM emulates legacy BIOS behavior, it frequently disables or hides Secure Boot settings. Turning it off is often the final step required before Secure Boot becomes available.
3. Installing Windows on an MBR Disk
A Windows installation using an MBR partition may prevent Secure Boot from working correctly.
Before enabling Secure Boot, confirm that the operating system is installed on a GPT partition. Converting the system disk using MBR2GPT is usually a safer option than reinstalling Windows from scratch.
4. Ignoring Firmware Updates
Motherboard manufacturers regularly release BIOS updates that improve compatibility, stability, and security.
Running outdated system firmware can result in missing Secure Boot options, firmware bugs, or compatibility issues with Windows 11.
5. Changing BIOS Settings Without a Backup
Firmware settings control how your computer starts. Making multiple changes without documenting the original configuration can make troubleshooting much more difficult.
Before modifying BIOS settings, record the default configuration or save a BIOS profile if your motherboard supports it.
Troubleshooting Table
The following table summarizes the most common Secure Boot problems and their recommended solutions.
| Problem | Possible Cause | Recommended Solution |
|---|---|---|
| Secure Boot option missing | Legacy BIOS enabled | Switch Boot Mode to UEFI |
| Secure Boot greyed out | Compatibility Support Module (CSM) enabled | Disable CSM in BIOS |
| Secure Boot unavailable | Missing Platform Keys (PK) | Restore factory Secure Boot keys |
| Cannot enable Secure Boot | MBR partition | Convert MBR to GPT |
| Secure Boot not supported | Outdated firmware | Install the latest BIOS update |
| Windows won’t boot after changing settings | Incorrect boot configuration | Restore previous BIOS settings and verify GPT partition |
| Secure Boot disappeared after BIOS update | Firmware reset | Reinstall default Secure Boot keys |
Expert Tip
Enable Secure Boot Only After Meeting All Prerequisites
Secure Boot should be enabled only after your PC is configured for UEFI mode, the Compatibility Support Module (CSM) is disabled, and your Windows installation uses a GPT partition. Enabling Secure Boot before these requirements are met can lead to boot failures or make the feature appear unavailable. Verifying each prerequisite first creates a smoother setup process and reduces the risk of startup problems.
Frequently Asked Questions
Why is the Secure Boot option missing in BIOS?
The Secure Boot option is usually hidden because the system is running in Legacy BIOS mode, CSM is enabled, the disk uses an MBR partition, or the required Secure Boot keys are missing.
Why is Secure Boot greyed out?
A greyed-out Secure Boot setting often indicates that Compatibility Support Module (CSM) is still enabled or the default Platform Keys (PK) have not been installed.
Can I enable Secure Boot without reinstalling Windows?
Yes. In many cases, you can switch to UEFI mode, disable CSM, and convert an MBR partition to GPT without reinstalling Windows.
Does Secure Boot require TPM 2.0?
No. Secure Boot and TPM 2.0 are separate technologies. However, Microsoft recommends enabling both to maximize Windows 11 security.
How do I restore Secure Boot keys?
Open your BIOS or UEFI firmware, navigate to the Secure Boot menu, and select Restore Factory Keys, Install Default Keys, or a similarly named option provided by your motherboard manufacturer.
Why can’t I enable Secure Boot after switching to UEFI?
Additional requirements may still be preventing Secure Boot from appearing. Check whether CSM is disabled, confirm the system disk uses GPT, and verify that the Platform Keys have been restored.
Does updating the BIOS fix Secure Boot problems?
It can. A firmware update often resolves compatibility issues, restores missing Secure Boot functionality, and improves support for Windows 11 security features.
Is Secure Boot available on every motherboard?
Most modern motherboards include Secure Boot support, but older hardware may lack full UEFI functionality. Always check your manufacturer’s documentation before making firmware changes.
Conclusion
A Secure Boot option missing error doesn’t necessarily indicate a hardware problem. In most cases, the issue stems from firmware configuration, boot mode, or storage partition settings that prevent Secure Boot from becoming available.
By switching from Legacy BIOS to UEFI mode, disabling Compatibility Support Module (CSM), converting an MBR partition to GPT, restoring Platform Keys (PK), and keeping your UEFI firmware up to date, you can resolve the majority of Secure Boot issues without reinstalling Windows.
If the option still doesn’t appear after completing these steps, review your motherboard’s firmware documentation or install the latest BIOS update provided by the manufacturer. Taking a methodical approach to troubleshooting helps ensure a stable and secure startup environment while meeting Windows 11 security requirements.